Intro
We are living in an era where AI technologies are evolving every day. With the rapid growth of capabilities such as large language models (LLMs), small language models (SLMs), and other AI frameworks, it has become increasingly difficult for organizations to decide which technologies to adopt.
Many businesses are actively exploring AI to gain faster insights, improve efficiency, and maintain a competitive advantage. However, the fast-paced AI ecosystem makes it difficult for CTOs and technology leaders to commit to a single hyperscaler.
This is where a multi-cloud strategy becomes critical. By leveraging multiple cloud providers such as Oracle Cloud Infrastructure (OCI), Amazon Web Services (AWS), Microsoft Azure, and Google Cloud, organizations maintain flexibility, access the best services each platform offers, and avoid vendor lock-in. A multi-cloud approach also allows businesses to harness the evolving AI landscape while ensuring architectural flexibility and resilience.
A multi-cloud approach allows businesses to leverage the rapidly evolving AI landscape while maintaining architectural flexibility and resilience.
Factors to Consider When Selecting a Hyperscaler
When evaluating a hyperscaler, key factors include:
- Cost optimization – Ensuring the cloud spend is efficient.
- Workload compatibility – Matching applications to the best platform.
- Available services – Leveraging unique services offered by each provider.
- Security capabilities – Maintaining compliance and protecting data.
- Integration with existing environments – Ensuring smooth interoperability.
These factors directly impact how quickly organizations can innovate and scale applications in the cloud.
Migrating Virtual Machines from AWS to OCI
In the previous article (Part 1) – Moving Virtual Machines Across Clouds Made Simple with Oracle Cloud Migration Service – we discussed how to create an Asset Source to discover and inventory virtual machines in the source environment.
In this Part 2, we will focus on the next stage of the migration process using Oracle Cloud Infrastructure Cloud Migration Service. Specifically, we will walk through how to create a Migration Project and define a Migration Plan to replicate virtual machines from Amazon Web Services to OCI.
These steps help organize the migration workflow, configure replication settings, and prepare workloads for migration, enabling a smooth transition of AWS-hosted virtual machines into OCI as native virtual machines.
Using this service, organizations can:
- Migrate AWS-hosted virtual machines directly to OCI
- Move VMware workloads to OCI as native virtual machines
- Transition VMware environments to Oracle Linux Virtualization Manager (OLVM)
- Simplify cross-cloud workload mobility while maintaining application consistency
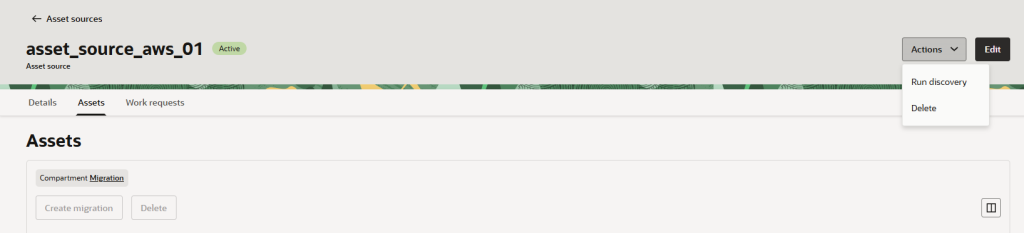
Since we already created the Asset Source in Part 1, the next step is to run the discovery process to verify that everything is configured correctly and that the migration service can detect the source virtual machines.
During this step, the service will attempt to discover assets from the source environment and populate the inventory.
Running Discovery and Populating the Inventory
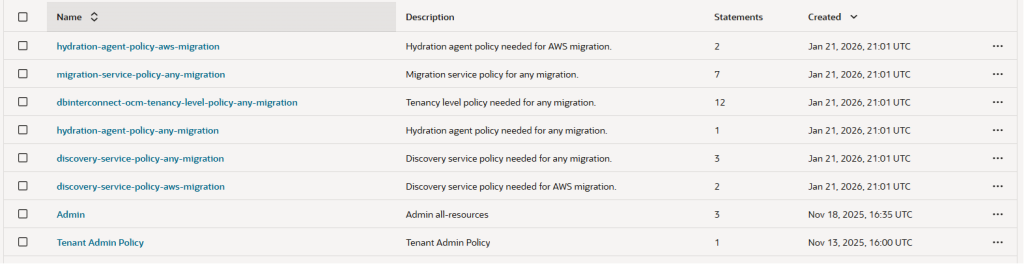
You also do not need to worry about manually creating most of the required policies. When you deploy the OCI stack, the necessary policies in Oracle Cloud Infrastructure are automatically created and assigned.
Required policies :
You can now execute the discovery process. During this step, the migration service will attempt to connect to the source environment and discover the available assets.
While performing the discovery, I encountered the following error:
Error:
“Unable to obtain secret from vault. Please check the AWS secret and IAM policies for AWS and re-run the discovery.”

To resolve this issue, ensure that the discovery secret is created in the correct compartment. The secret must be stored in the MIGRATONSECRET compartment so that the migration service in Oracle Cloud Infrastructure can properly access it.
Once the secret is placed in the correct compartment, re-run the discovery process, and the asset discovery should complete successfully.
As shown in Figure 2, this is the process for executing discovery, retrieving asset information, and populating the inventory.
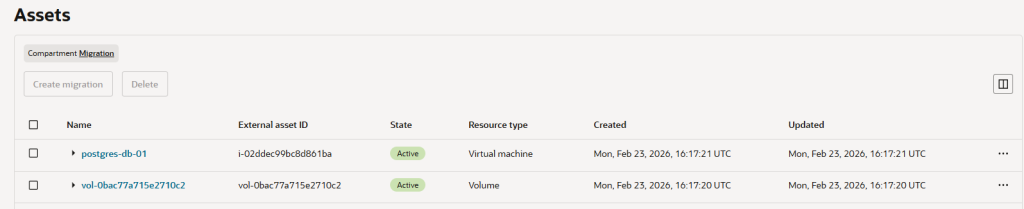
Once the asset discovery is complete, the assets will be listed in the asset inventory as shown below.
What it discovers: As Oracle collects real-time cost and usage data, it can suggest ways to optimize your VM sizes, helping you “right-size” your resources efficiently.
Figure 4 gives an overview of the different VM shapes and types, making it easier to understand your options at a glance.
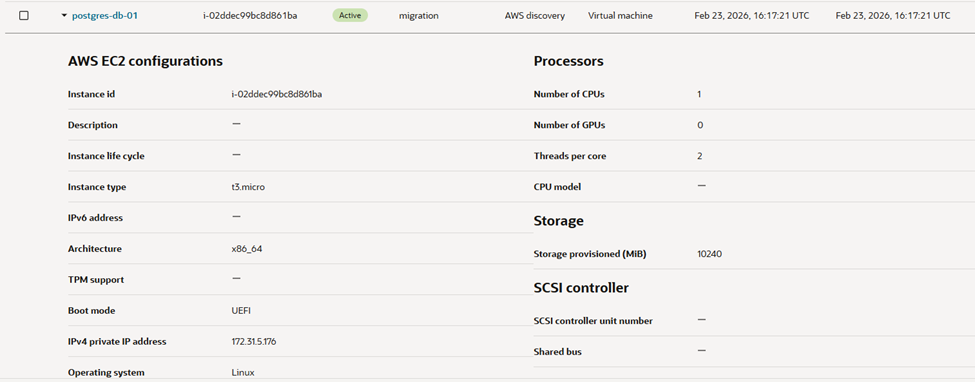
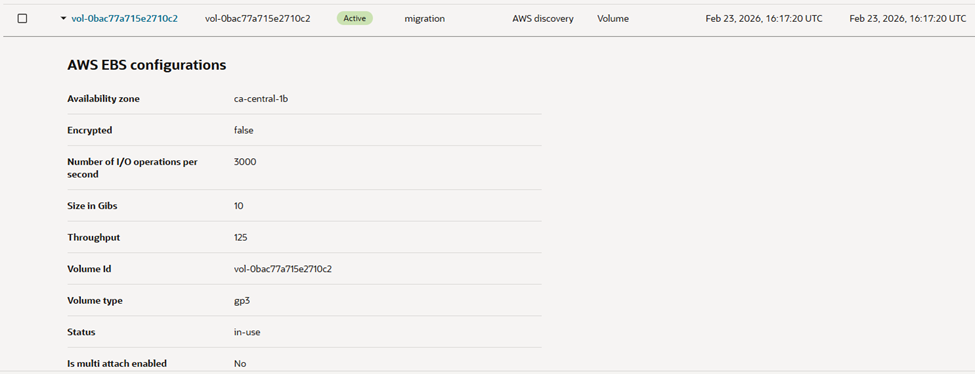
Figure 5 provides a clear view of your block volumes, highlighting their size, type, and throughput for easier management and planning.
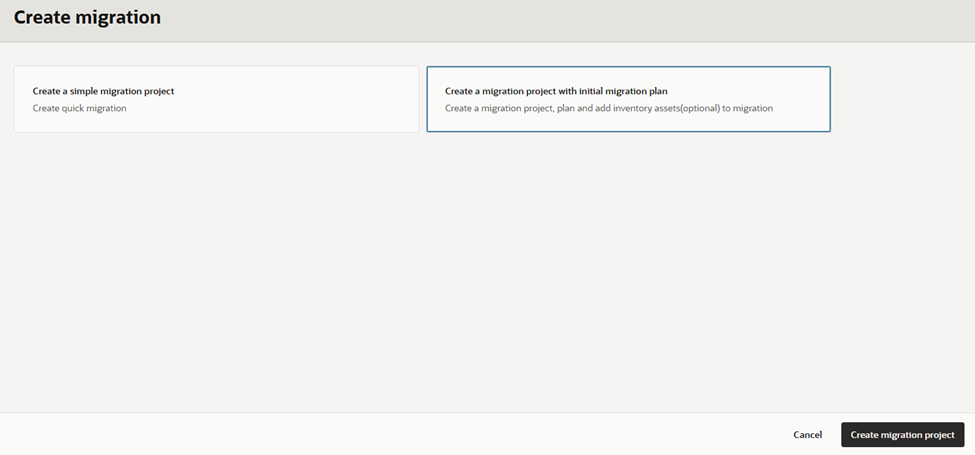
Create Migration Project
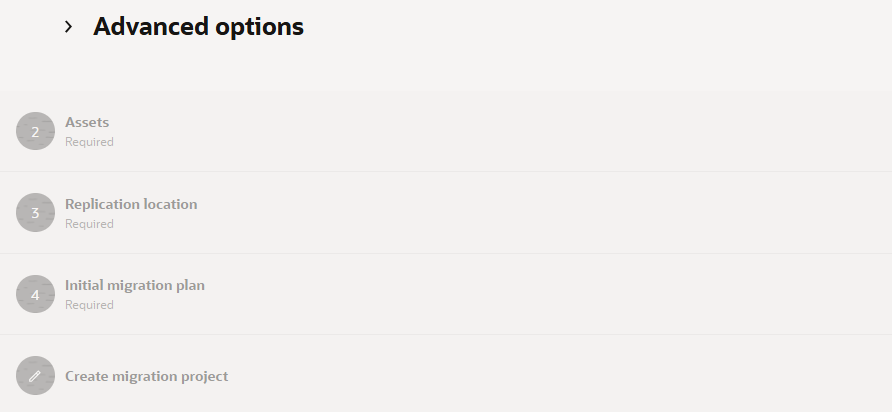
As shown in Figure 6, we will create a migration project along with the initial migration plan.
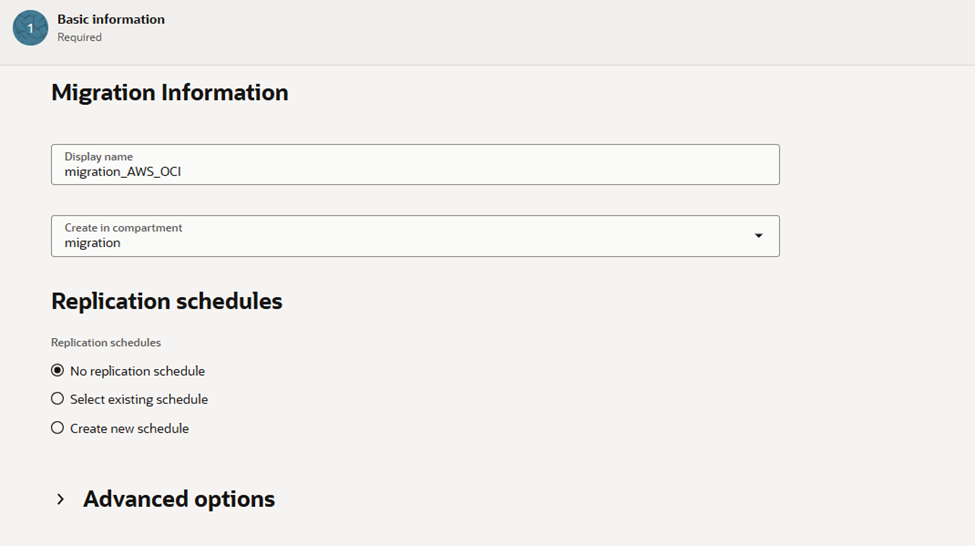
Provide a migration name and configure the replication schedule. Since this is a testing scenario, I am not selecting a migration schedule.
In this step, there are four main sections that need to be configured:
- Asset Selection – Choose the assets from the inventory that you want to include in the migration.
- Replication Location – Define where the replicated data will be stored in OCI.
- Initial Migration Plan – Configure the initial migration settings and replication behavior.
- Create Migration Project – Finalize the configuration and create the migration project.
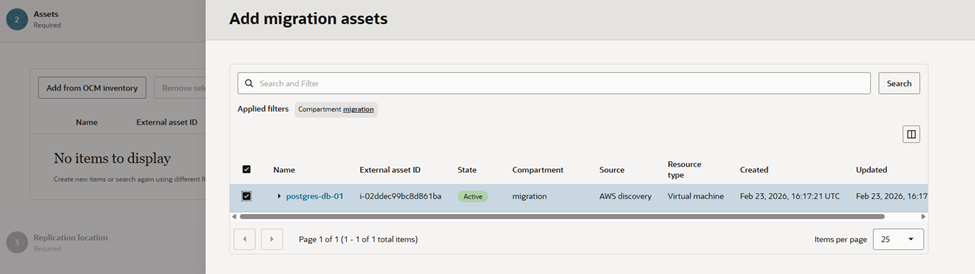
The next step is to select the assets from the inventory that will be included in the migration.
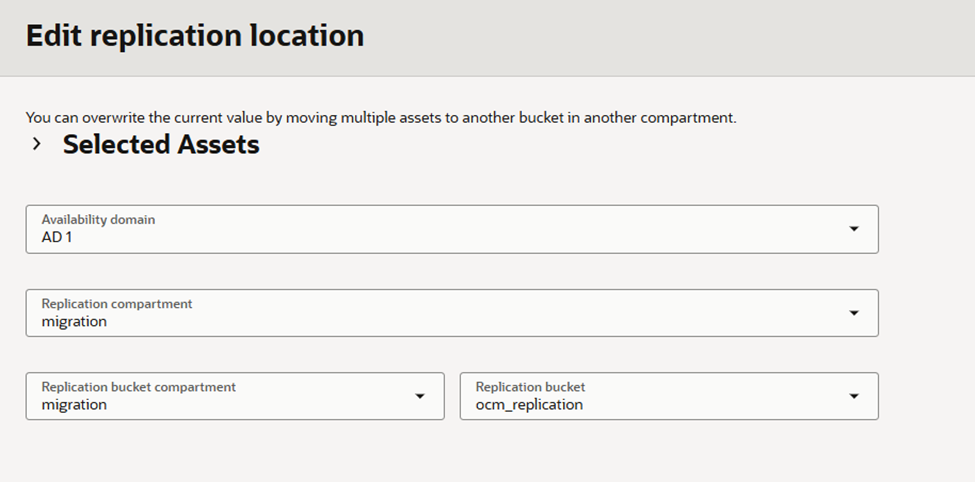
Select the appropriate migration location as shown below. This Object Storage bucket is automatically created when the OCI stack for the Cloud Migration service is deployed.
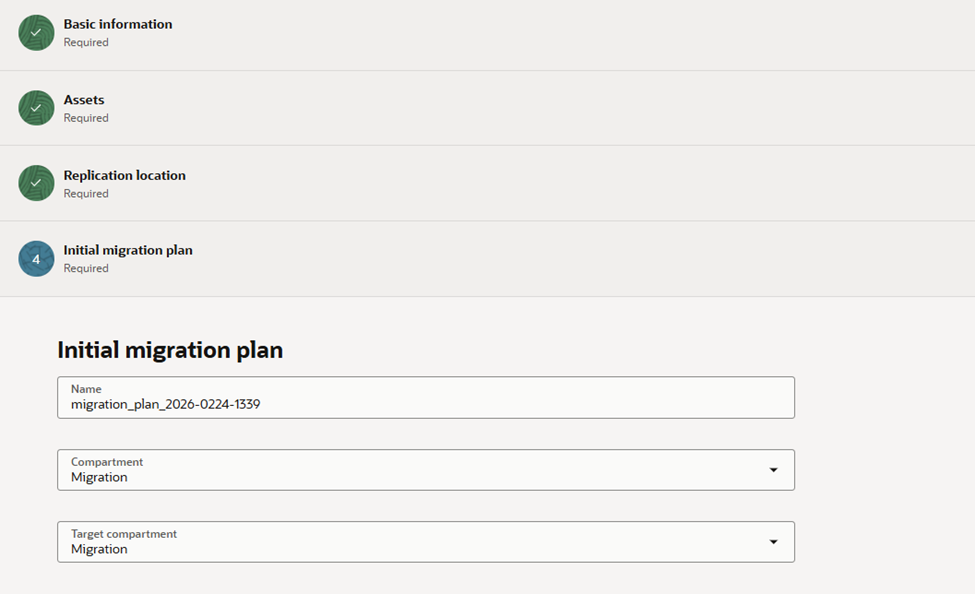
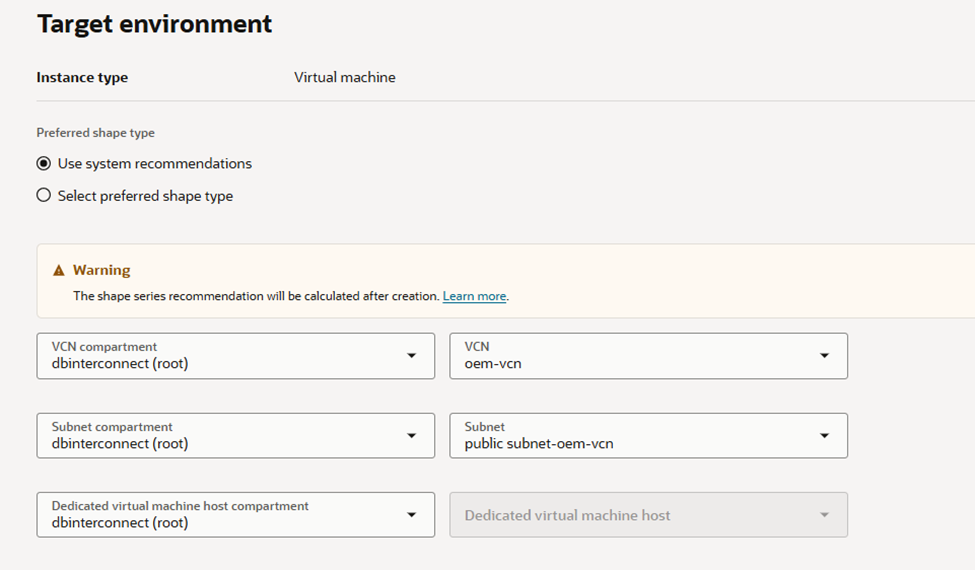
Create migration Plan
In the final phase, we need to create the migration plan.
In this step, I am selecting the system-recommended shape.
However, you also have the option to modify and choose a different shape based on your preference or requirements.
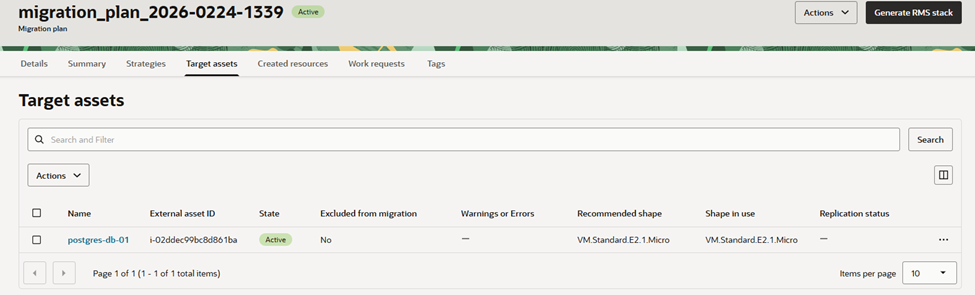
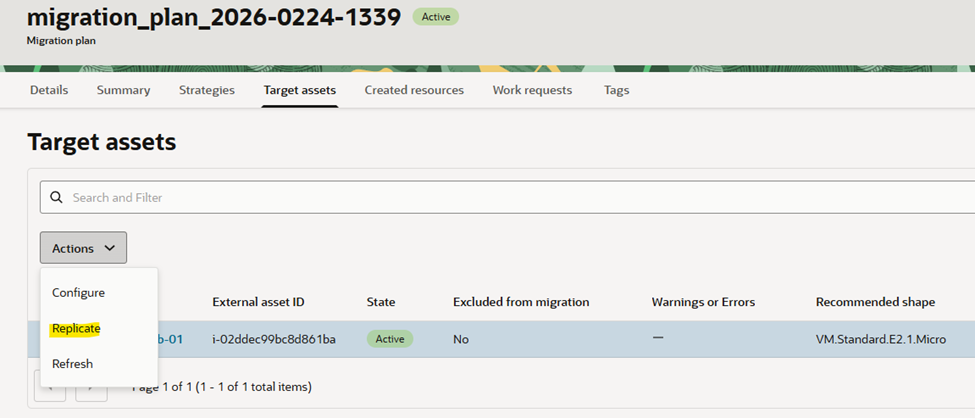
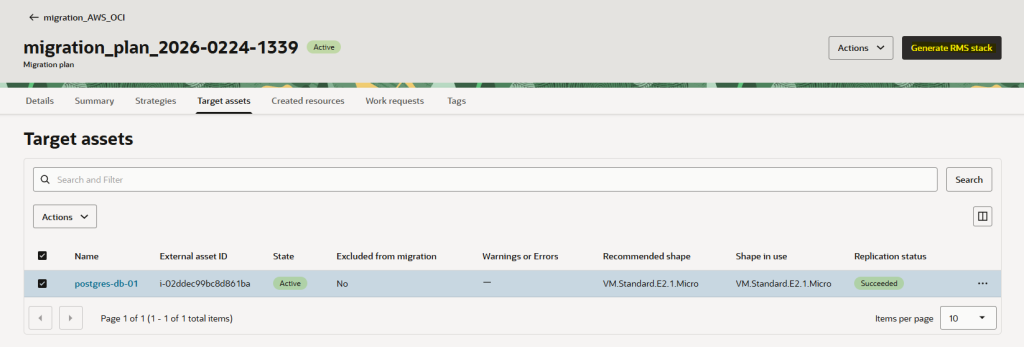
Now, go to the migration plan and choose the asset you previously selected for replication.
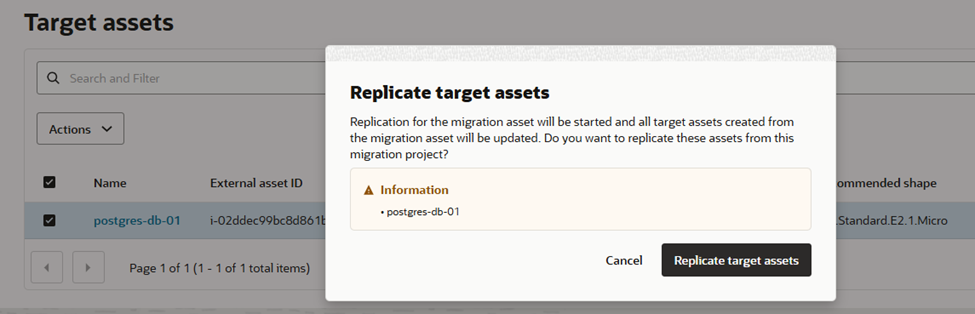
Select the target asset and restart the replication. This process can also be scheduled to run automatically, creating a snapshot that is replicated to OCI.
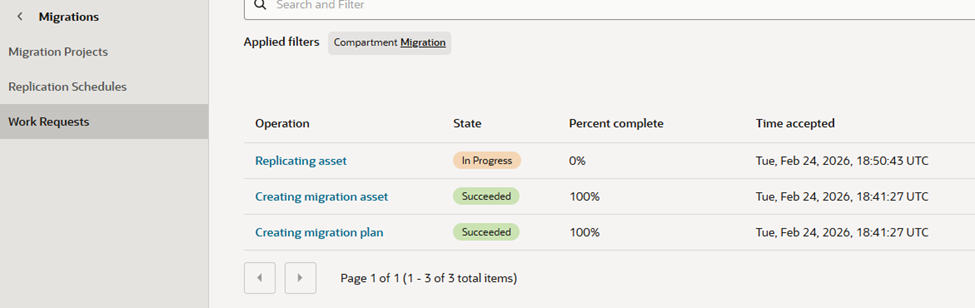
Here’s what it looks like while replication is running in the worker request.
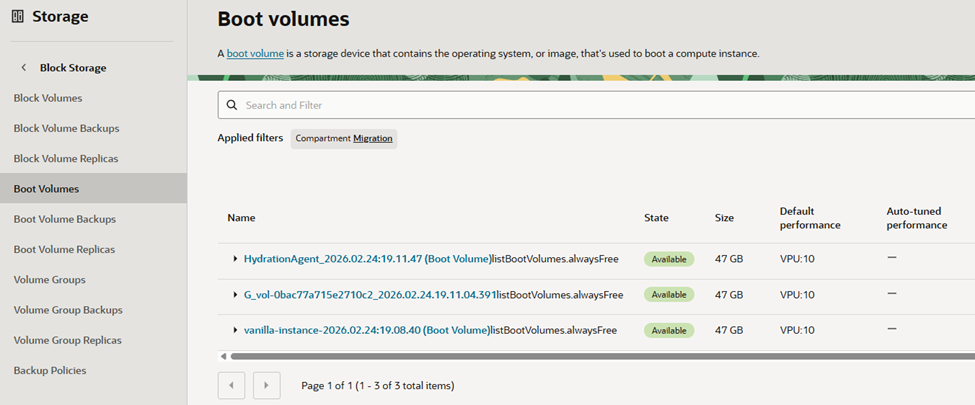
Once the replication is complete, you will see the boot volume listed under Boot Volumes.
After replication finishes, generate the RMS stack, which enables the VM to be provisioned automatically without any manual steps.
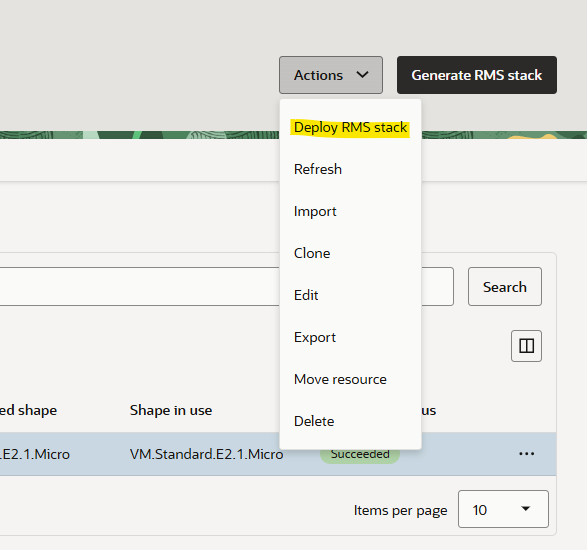
Once the RMS stack generation is complete, deploy the RMS stack.
Once the deployment is complete, the instance will be created in OCI.

Conclusion
By following these steps, organizations can effectively leverage Oracle Cloud Infrastructure Cloud Migration Service to streamline the migration of virtual machines from AWS to OCI. From creating an Asset Source and running discovery to defining a Migration Project and Plan, each phase ensures that assets are accurately inventoried, replication is configured correctly, and workloads are prepared for a smooth transition.
Adopting a structured migration approach not only reduces operational risk but also allows businesses to take advantage of OCI’s native capabilities, optimize costs, and maintain application consistency across clouds. In today’s rapidly evolving AI and multi-cloud landscape, having a flexible, repeatable migration strategy is critical for organizations seeking agility, resilience, and the ability to innovate without being tied to a single hyperscaler.